Using the Editor
The Playbook editor combines simplicity with powerful formatting capabilities, making it easy to create beautiful documentation. This guide will walk you through the essential features and best practices for using the editor effectively.
Getting Started
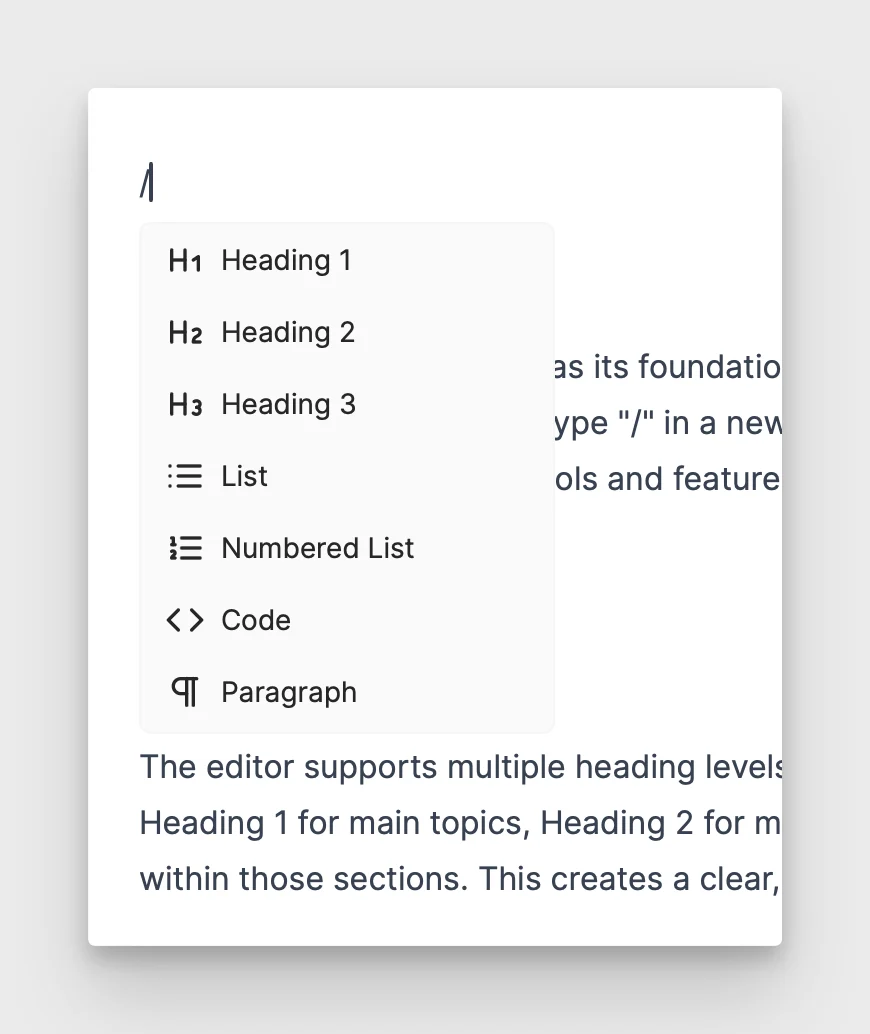
The editor uses markdown as its foundation, enhanced with an intuitive interface. To access formatting options, simply type "/" in a new line to open the command menu. This menu is your gateway to all formatting tools and features available in the editor.
Text Formatting
Headings and Structure
The editor supports multiple heading levels to help you organize your content hierarchically. Use Heading 1 for main topics, Heading 2 for major subsections, and Heading 3 for detailed breakdowns within those sections. This creates a clear, scannable structure for your readers.
Inline Formatting
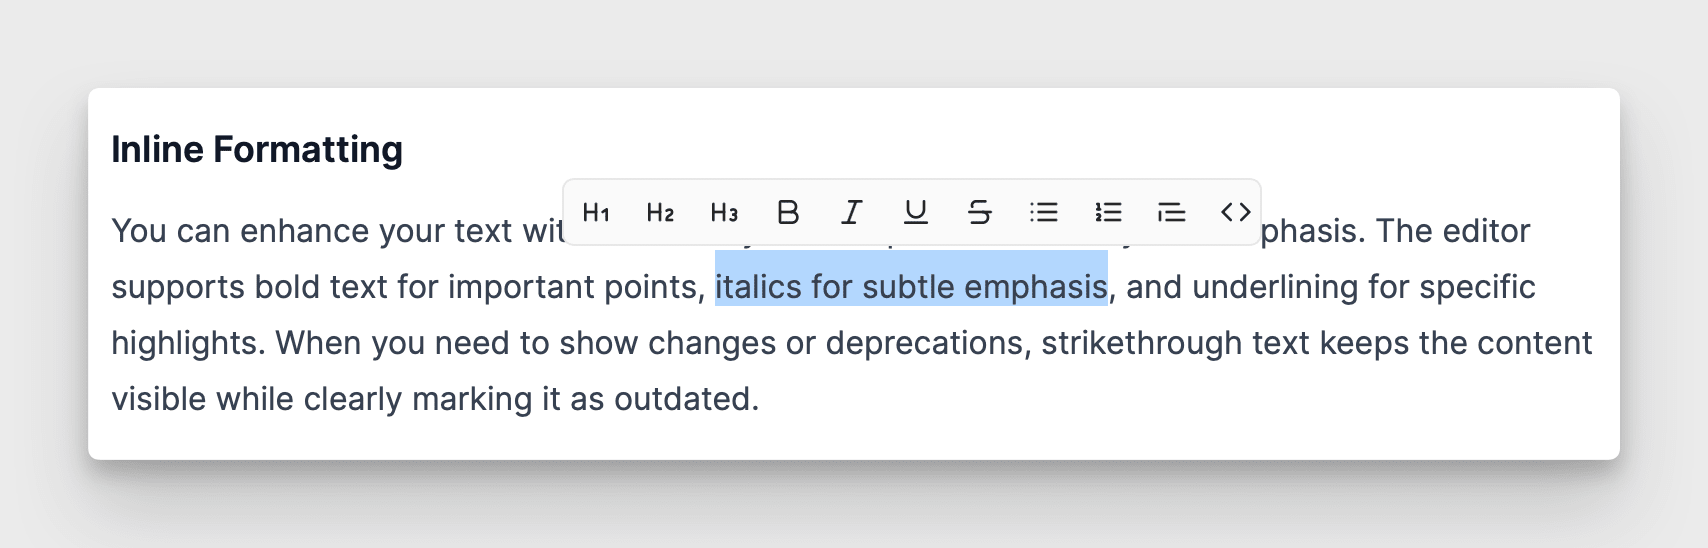
You can enhance your text with various styles to improve readability and emphasis. The editor supports bold text for important points, italics for subtle emphasis, and underlining for specific highlights. When you need to show changes or deprecations, strikethrough text keeps the content visible while clearly marking it as outdated.
Creating Rich Content
Lists and Organization
The editor provides both ordered and unordered lists to help structure your content. Use numbered lists when sequence matters, such as step-by-step instructions or prioritized items. Bullet lists work well for collections of related points where order isn't important.
Code and Technical Content
When documenting technical concepts, code blocks are essential. The editor provides syntax highlighting for various programming languages, making your code examples clear and readable. Simply type "/" and select "Code Block" to begin.
Working with Media
Images
Adding visual elements to your documentation is straightforward. You can:
- Drag and drop images directly into your document
- Paste images from your clipboard
- Use the "/" command to insert images from your computer
The editor automatically handles image optimization and storage, ensuring your documentation loads quickly while maintaining image quality.
Links and References
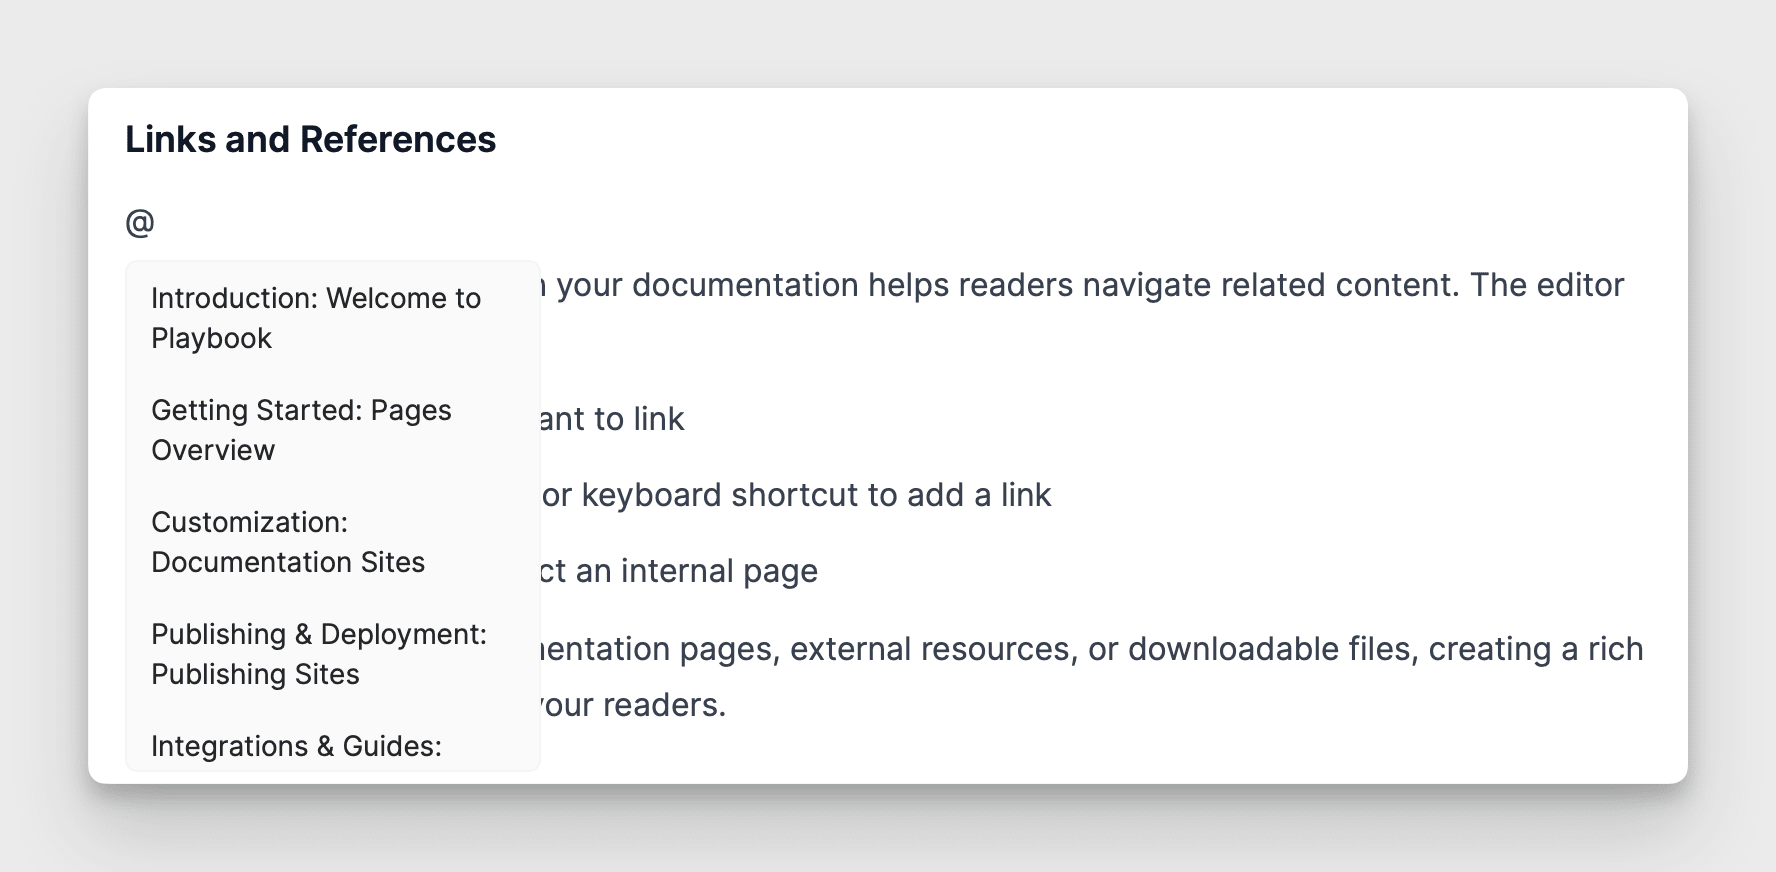
Creating connections within your documentation helps readers navigate related content. The editor makes it easy to add links:
- In the editor, press
@to open the command menu - Select the page you want to link to
- A link will be created automatically
You can link to other documentation pages, external resources, or downloadable files, creating a rich network of information for your readers.
Best Practices
When working with the editor, consider these tips for creating effective documentation:
- Start with a clear structure using appropriate heading levels
- Use formatting purposefully - don't overuse bold or italics
- Include relevant images to illustrate complex concepts
- Break up long content with subheadings and paragraphs
- Preview your changes before publishing
Remember that the "/" command menu is always available to help you discover and use the editor's features. Take time to explore the available options as you become more comfortable with the editor.